
If you’re searching for a delightful treat that’s both easy to prepare and perfect for any occasion, look no further than our cheesecake ball recipe. These bite-sized delights are the ultimate solution for parties, potlucks, or even a quick snack. Made with just a few simple ingredients, these no-bake cheesecake balls are sure to become a crowd favorite.
What makes this recipe stand out is its simplicity. You don’t need to turn on your oven—just mix, shape, and chill. The base of our cheesecake mixture is made from creamy cream cheese, blended with graham cracker crumbs for a satisfying crunch. A hint of vanilla extract adds a touch of flavor, making each bite truly special.
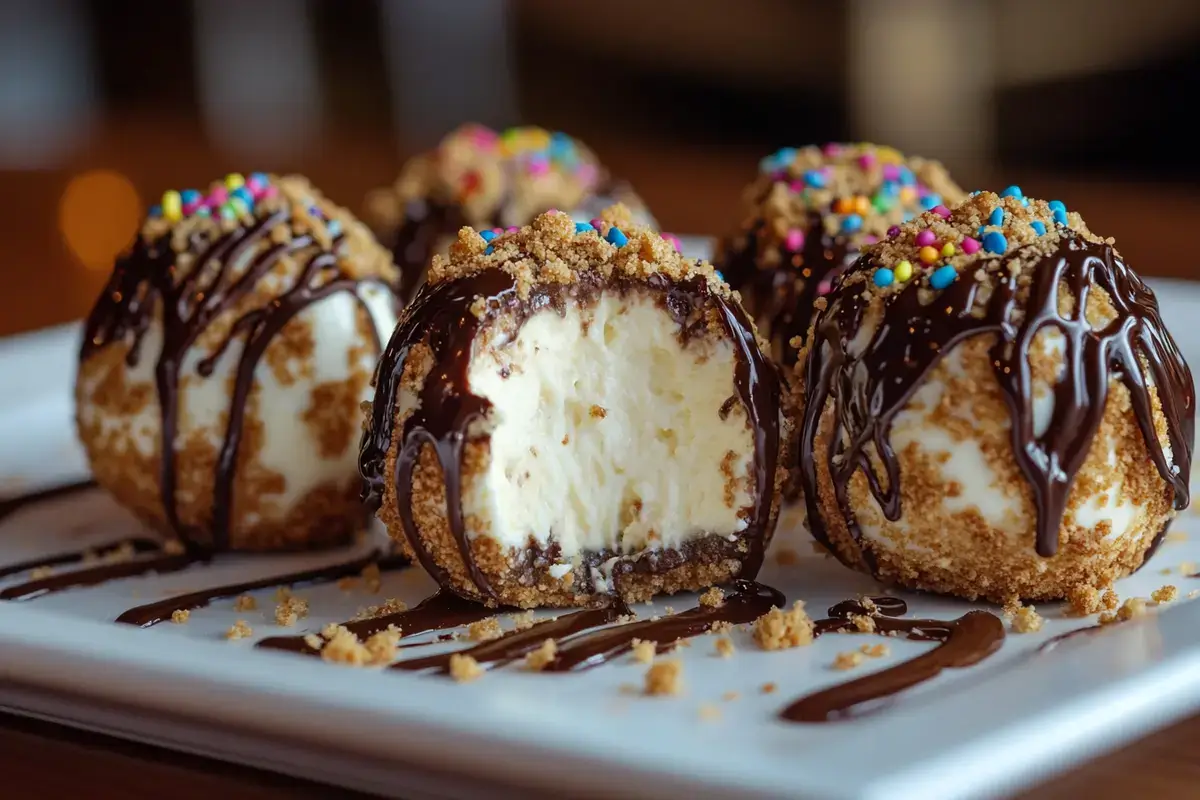
Ready to serve, these little treats are a breeze to prepare. Simply roll the mixture into balls, coat them in your favorite toppings like crushed nuts or chocolate, and refrigerate until firm. They’re perfect for on-the-go snacking or as a stylish addition to any dessert tray.
Key Takeaways
- Enjoy a no-bake recipe that’s quick and easy to prepare.
- Use simple ingredients like cream cheese, graham crackers, and vanilla extract.
- Customize with your favorite coatings for a personal touch.
- Perfect for parties, gatherings, or as a ready-to-serve snack.
Jump ahead to:
Ingredients and Essential Tools
Creating the perfect cheesecake ball starts with the right ingredients and tools. Let’s break down what you’ll need to make these delicious treats at home.
Cream Cheese, Butter, and Powdered Sugar
Quality matters when it comes to your ingredients. Use room temperature cream cheese for a smoother texture. Pair it with unsalted butter and powdered sugar to create a creamy base that’s the heart of your cheesecake balls. This trio ensures a rich, velvety mixture that’s easy to shape and coat.
| Ingredient | Role | Quantity |
|---|---|---|
| Cream Cheese | Base | 8 oz |
| Butter | Enhances Flavor | 1/4 cup |
| Powdered Sugar | Sweetens and Softens | 1/2 cup |
Graham Cracker Crumbs and Coating Options
Graham cracker crumbs aren’t just for crunch—they bind the mixture and mimic the classic cheesecake crust. For coatings, get creative! Try crushed cookies, mini chocolate chips, or even sprinkles for a colorful touch. These coatings add texture and make each bite unique.
Don’t forget the tools! You’ll need an electric mixer, mixing bowls, measuring cups, and clean hands for rolling. With these basics, you’re ready to craft perfect cheesecake balls every time.
Understanding the No-Bake Technique
Looking for a quick and delicious dessert that’s perfect for any occasion? The no-bake technique is a game-changer, especially for those with a busy lifestyle. This method not only saves time but also ensures your treats retain their rich, creamy texture and vibrant flavor.
Why No-Bake is a Game Changer
With the no-bake method, you can enjoy the same creamy texture and rich flavor as traditional cheesecakes without the hassle of baking. Using room temperature cream cheese is key—it ensures a smooth mixture that’s easy to work with. This technique is perfect for those who want to impress without spending hours in the kitchen.
Comparing it to traditional cheesecakes, the no-bake version offers the same delicious taste but with less effort. You can customize your treats with coatings like crushed chocolate or oreo crumbs, making each bite a delightful experience. Plus, storing them in an airtight container keeps them fresh for up to a week, perfect for meal prepping or hosting gatherings.
Whether you’re catering to a crowd or making a quick snack, the no-bake method delivers convenience and quality. It’s the perfect blend of simplicity and indulgence, making it a favorite for any occasion.
Tips for a Perfect Cheesecake Ball Texture
Creating the perfect texture for your cheesecake balls is all about balance. A smooth, creamy center with a satisfying crunch makes each bite memorable. Here are some expert tips to ensure your treats turn out perfectly every time.
Importance of Room Temperature Ingredients
Start by using ingredients at room temperature. Soft cream cheese and butter mix together seamlessly, creating a velvety base. This ensures your mixture is smooth and easy to shape. The graham cracker crumbs add the perfect crunch, making each bite irresistible.
Mixing and Chilling Techniques
Use an electric mixer to blend the ingredients thoroughly. This step is crucial for a uniform texture. Once mixed, cover the dough with plastic wrap and chill it in the fridge. Chilling for at least an hour (or overnight) helps the flavors meld and makes the dough easier to handle.
When rolling the dough, keep it chilled to maintain shape. For a consistent texture, avoid overworking the mixture. Experiment with coatings like crushed nuts or chocolate for added variety, ensuring each bite is unique and satisfying.
Step-by-Step Cheesecake Ball Recipe
Mastering the art of making cheesecake balls is easier than you think! Start by gathering your ingredients and tools. The key to success lies in the right combination of graham cracker crumbs, cream cheese, and vanilla extract, which come together to create a delectable mixture.
Preparing the Cheesecake Mixture
Begin by mixing cream cheese, butter, and powdered sugar in a large bowl. Add graham cracker crumbs and vanilla extract, ensuring all ingredients are well combined. Scrape the sides of the bowl frequently to ensure a smooth, even mixture. This step is crucial for achieving that signature creamy texture.
Rolling and Coating the Balls
Once the mixture is ready, chill it in the fridge for at least an hour. Lightly spray your hand with cooking spray to prevent sticking. Roll small portions of the mixture into balls, then coat them in your chosen topping, like crushed nuts or chocolate. This adds a delightful crunch to each bite.
Final Chilling and Serving Instructions
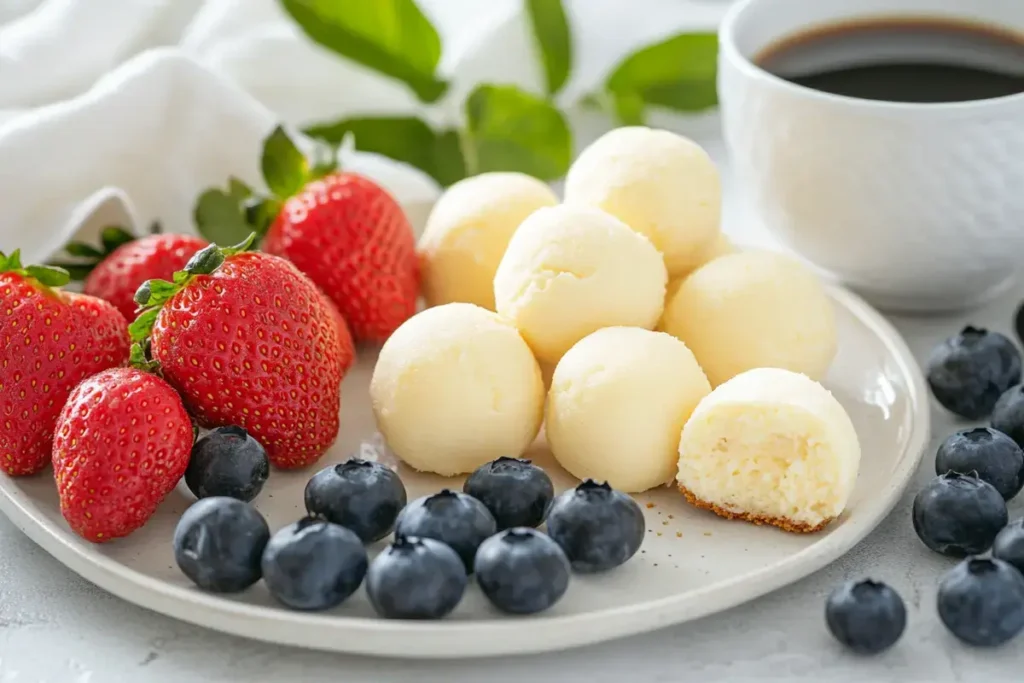
Place the coated balls in a container and refrigerate for 2-3 hours to firm up. When serving, pair them with fresh berries or a drizzle of chocolate for a stunning presentation. These bites are perfect for parties or as a quick snack!
Variations and Customizations
Take your cheesecake balls to the next level with creative variations and customizations that suit any occasion. Whether you’re aiming for a classic look or something bold, there are endless ways to make your dessert stand out.
Alternative Coatings: Get Creative with Your Dessert
Don’t be afraid to mix things up with unique coatings. Try drizzling melted chocolate over your cheesecake balls for a rich, indulgent touch. Or, sprinkle colorful sprinkles for a fun, festive vibe. Crushed Oreos or nuts can add a satisfying crunch, while coconut flakes offer a tropical twist. These coatings not only enhance the flavor but also make your dessert visually appealing.
Flavor Boosters: Elevate Your Cracker Crumbs
For a burst of flavor, consider adding mix-ins like lemon zest or peppermint extract. A pinch of cinnamon or a swirl of caramel can elevate the taste profile. Even a touch more sugar can adjust the sweetness to your liking. These small tweaks can transform your dessert into something extraordinary.
With these ideas, you can create themed versions for holidays or parties. Share your creations on social media and inspire others to try their hand at this versatile dessert!
Storing and Freezing Instructions
Proper storage and freezing are key to keeping your cheesecake balls fresh and delicious. Whether you’re prepping for a party or saving leftovers, these tips will help you maintain their quality.
Refrigerator Storage Tips
Store your cheesecake balls in an airtight container in the refrigerator. They’ll keep well for up to a week. Make sure to chill them for at least 1-2 hours after shaping to set properly.
Freezing and Thawing Guidelines
For longer storage, wrap each ball individually in plastic wrap. Place them in a freezer-safe container and freeze for up to 3 months. Thaw at room temperature for about an hour before serving. They’ll retain their texture and flavor, making them a great make-ahead treat!
With these simple steps, you can enjoy fresh, creamy cheesecake balls anytime you like. Perfect for parties or anytime you crave a sweet treat!
Occasions and Serving Suggestions
Looking for a versatile dessert that can elevate any gathering? Our recipe is a hit at parties, picnics, and even as a grab-and-go snack. These treats are perfect for casual get-togethers, elegant celebrations, or even as a sweet addition to a holiday meal.
Perfect for Parties and On-the-Go Treats
These little bites are perfect for any occasion. Whether you’re hosting a summer BBQ, a holiday party, or just need a quick snack, they’re always a hit. Their portability makes them ideal for picnics, road trips, or packing for school lunches.
Here’s how to make the most of them:
- Pair with coffee or tea for a cozy afternoon treat.
- Serve as part of a dessert buffet alongside other mini treats.
- Use themed coatings to match the occasion, like seasonal sprinkles for holidays or tropical flavors for summer.
For a polished presentation, try these ideas:
- Place them in clear glass containers with colorful liners.
- Use mini dessert stands for a upscale look.
- Add a decorative label or ribbon for a custom touch.
“These are the perfect party favors—they’re easy to make and always impress guests.”
With a little creativity, you can adapt them to any theme or season. Plus, since they’re made ahead and stored in the refrigerator, they’re always ready when you need them.
| Occasion | Serving Size | Storage Tip |
|---|---|---|
| Party | Large platter | Refrigerate until 30 minutes before serving. |
| On-the-Go | Individual containers | Portion into small containers for easy transport. |
| Holiday | Themed platters | Add seasonal decorations for a festive touch. |
Whether you’re hosting a small gathering or a large event, these treats are sure to be a hit. Their adaptability and convenience make them a staple in any baker’s repertoire.
Nutritional Information and Food Pairings
Understanding the nutritional profile of your cheesecake balls can help you enjoy them guilt-free. Let’s dive into the caloric breakdown and explore how to pair them with complementary snacks and beverages for a balanced treat.
Caloric Breakdown and Ingredient Insights
Each cheesecake ball typically contains around 150-200 calories, depending on the size and coatings used. Here’s a quick breakdown:
| Ingredient | Calories | Protein (g) | Fat (g) |
|---|---|---|---|
| Cream Cheese | 50-60 | 4-5 | 5-6 |
| Graham Cracker Crumbs | 25-30 | 1 | 0.5 |
| Coating (e.g., crushed nuts) | 10-15 | 1 | 1 |
Using full-fat cream cheese adds richness, while low-fat alternatives can reduce calories slightly. Pairing with whole-grain crackers can add fiber for a more balanced snack.
Complementary Snack and Beverage Pairings
Enhance your experience with these pairing ideas:
- Crackers with a side of fresh fruit for a light dessert option.
- Black tea or coffee to complement the creamy texture.
- Light salads for a balanced meal or party platter.
For a refreshing twist, try serving with vanilla-infused beverages like iced tea or coffee.
“A perfect snack is more than just taste—it’s about balance and enjoyment.”
With these insights, you can enjoy your cheesecake balls while keeping your taste buds and waistline happy!
Troubleshooting and Chef’s Insights
Making the perfect cream-based treat can sometimes feel like a challenge, but with a few expert tips, you’ll be crafting flawless bites every time. Let’s explore common pitfalls and how to overcome them for consistently delicious results.
Common Mistakes to Avoid
One frequent issue is using cream cheese that’s too cold. This can lead to a grainy texture. Always let your cream cheese come to room temperature before mixing. Another common problem is under-mixing the batter, which can leave chunks of cream cheese in your treat. Make sure to mix thoroughly until smooth.
When rolling the mixture, if it’s too sticky, it might not hold its shape. A quick fix is to chill the dough for an additional 15-20 minutes. This helps firm up the texture, making it easier to handle.
Expert Tips for Consistent Results
Use a clean bowl and ensure all ingredients are at room temperature before mixing. This ensures a smooth, even texture. When rolling, lightly dampen your hands to prevent sticking—this trick makes handling the mixture much easier.
If your treat feels too firm after chilling, let it sit at room temperature for 15 minutes before serving. This softens the texture without compromising the shape. For even coating, try rolling the balls in a bowl of your chosen topping and gently pressing to ensure full coverage.
Remember, practice makes perfect. Don’t hesitate to experiment with small batches to refine your technique.
With a little patience and these expert tips, you’ll master the art of creating creamy, perfectly textured treats that everyone will love!
Conclusion
Ready to enjoy the delicious simplicity of this Cheesecake Ball Recipe? This no-bake treat is a breeze to prepare, perfect for any occasion, and sure to impress. With just a few key ingredients and a little time, you can create a dessert that’s both elegant and satisfying.
From mixing the creamy cheesecake ball mixture in your kitchen to chilling them until firm, the process is foolproof. Whether you’re serving them at a party or enjoying them as a quick snack, these bites are always a hit. Their versatility makes them easy to customize, so feel free to experiment with different coatings and flavors to suit your taste.
We’d love to hear how your Cheesecake Ball Recipe turned out! Share your creations on social media, rate the recipe, or leave a comment below with your tips and tricks. Happy baking, and enjoy the sweet satisfaction of making something truly special!
FAQ
How do I make the perfect cheesecake ball mixture?
Start by mixing cream cheese, softened butter, and powdered sugar until smooth. Add vanilla extract for flavor, then gradually incorporate graham cracker crumbs. Chill the mixture for at least 30 minutes to firm up before rolling into balls.
What are the best coating options for cheesecake balls?
You can coat the balls in crushed graham crackers, chocolate coating, or even mini cookie crumbs. For extra flavor, mix in a teaspoon of vanilla extract or a pinch of cinnamon into the coating mixture.
Can I make these ahead of time for a party?
Absolutely! Prepare the cheesecake balls up to 2 days in advance. Store them in an airtight container in the refrigerator. When ready to serve, let them sit at room temperature for 10-15 minutes for the best texture.
How do I prevent the balls from sticking?
Roll the mixture in plastic wrap or parchment paper before coating. This ensures the balls don’t stick to your hands or the coating. If using graham cracker crumbs, press them gently onto the mixture while it’s still slightly warm.
Can I substitute graham cracker crumbs?
Yes! You can use crushed oreo cookies, chocolate cookie crumbs, or even a mix of graham cracker and cocoa powder for a chocolatey twist. Get creative with your favorite flavors!
How long can I store cheesecake balls in the freezer?
Cheesecake balls can be frozen for up to 2 months. Wrap them individually in plastic wrap, then place in an airtight container. Thaw in the refrigerator overnight before serving.
What’s the secret to a smooth texture?
Use room temperature ingredients and mix them thoroughly. Avoid overmixing, as this can introduce air bubbles. For a creamier texture, add a tablespoon of heavy cream to the mixture.
Can I make mini cheesecake balls?
Absolutely! Simply roll the mixture into smaller portions, about 1-inch in diameter. Mini balls are perfect for bite-sized treats or party favors.
How do I make the coating stick better?
Dip the chilled cheesecake balls in melted chocolate or a liquid coating, then roll them in your desired coating. This creates a better bond and ensures the coating stays put.
Can I add mix-ins to the cheesecake mixture?
Yes! Fold in mix-ins like chocolate chips, crushed nuts, or even a swirl of jam for a unique flavor. Just make sure mix-ins are at room temperature to avoid affecting the texture.
For more delicious and easy recipes, Discover More Recipes.